plugins, skins and other resources for computer-based audio production

Hidden MIDI Keyboard

Instructions for use and installation on macOS

Installation

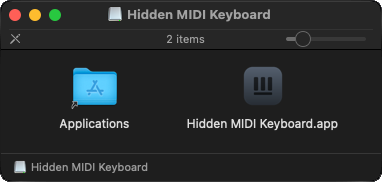
To install the app, open the DMG installer and drag the app icon to the Applications folder.
Accessibility Access

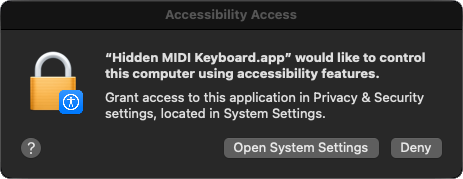
The first time you run the app, a notification will appear stating that it requires accessibility permissions. Click on ‘Open System Settings’ and enable the permissions for the app.
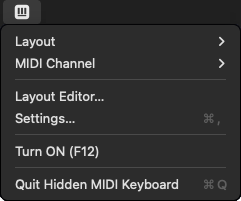
Menu Bar Icon

When the app is running, an icon is displayed in the menu bar. The app does not display any icon in the Dock.

The drop-down menu allows you to change the layout and turn the app on/off. These two options are also accessible via keyboard shortcuts. However, MIDI channel selection is only accessible from the menu.
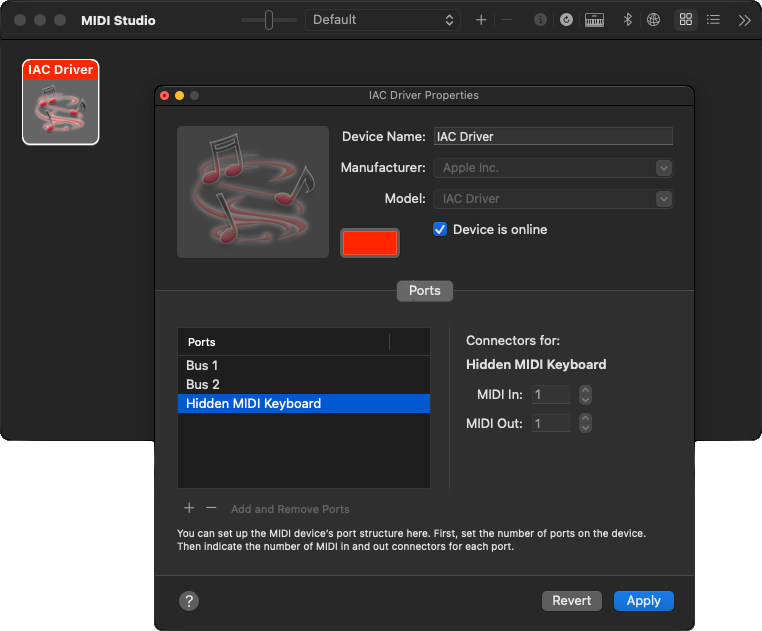
 

Vitual MIDI Port

The app needs a virtual MIDI port to communicate with the DAW or other software that receives MIDI data. By default, macOS has two virtual ports configured (Bus 1 and Bus 2). If you prefer to create one just for the app, open the ‘Audio MIDI Setup’ app and in the ‘Window’ menu select ‘Show MIDI Studio’.

Double-clicking ‘IAC Driver’ opens a window where you can add ports. Simply click the ‘+’ button in the bottom left corner, give the port a name, and click ‘Apply’. You will then need to select that port in the app’s settings.

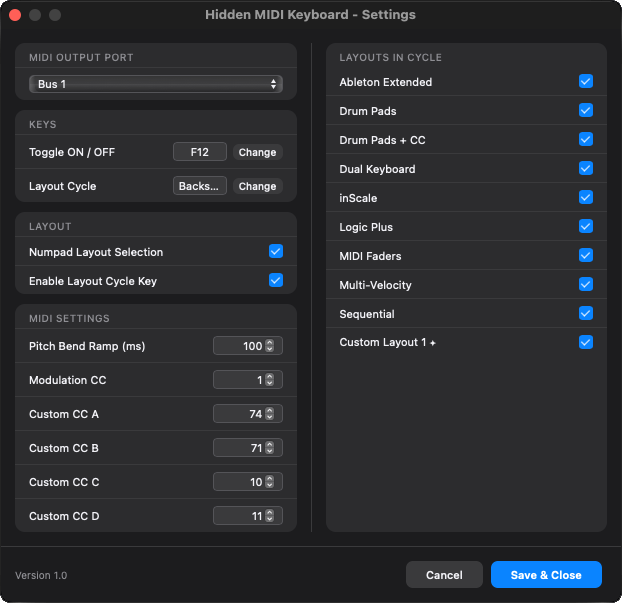
Settings

The first step is to select the MIDI output port. This port will be used to send the MIDI data generated by the app. The same port must be selected in your DAW for it to receive the MIDI data.

If you’re using Ableton Live, select the port as Track input in Live’s settings. For other DAWs, consult their respective manuals.

The second step is to assign the ‘Toggle ON/OFF’ key. This key activates/deactivates the app, so your computer keyboard only acts as a virtual MIDI keyboard when needed.

Keep in mind that this key works independently of the currently active app. Make sure it doesn’t interfere with keys used by other apps you frequently use.

With this configured, you can now use the app. However, there are more options detailed below.
You can switch between the app’s different layouts from the menu displayed when you click the app icon or by using the key configured in ‘KEYS > Layout Cycle’. This key only works when the app is active, so there’s no risk of it interfering with other apps, unlike the ‘Toggle ON/OFF’ key.

The ‘Layout Cycle’ key cycles through the layouts selected in ‘LAYOUTS IN CYCLE’, which includes a list of both predefined layouts and any custom layouts you create. You can disable ‘Enable Layout Cycle Key’ if you don’t want to use this feature.

You can also use the numeric keypad to switch to a specific layout when ‘Numpad Layout Selection’ is selected.

The ‘MIDI SETTINGS’ section allows you to configure how fast or slow pitch bend messages are sent, and the CC numbers used by the predefined templates. In custom layouts, you can select the number of CCs independently for each key.

Custom Layout Editor

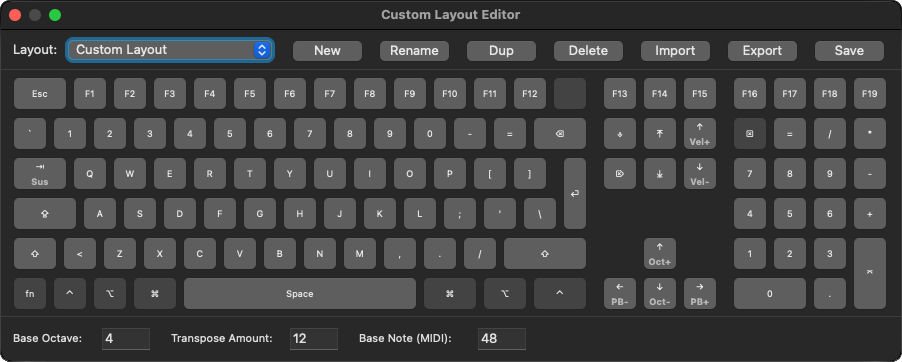
The editor is accessed via the menu bar icon. It allows you to create as many layouts as you like. These will be available in the layout list of the settings window to include when changing the layout.

The top controls include layout selection and actions such as create/delete, import/export, etc. Note that predefined templates cannot be edited. If you want to modify a predefined template, you must create a new template and configure it in the same way as the predefined one.

The controls at the bottom set values ​​used by the template regarding:

  • Base Octave: The octave in which the layout will start when the app launches.
  • Transpose Amount: The number of notes transposed by the octave [-] [+] keys.
  • Base Note: MIDI notes can be configured as fixed (always the same note value) or relative to the value set by this control.

Remember to click the Save button before closing the window.

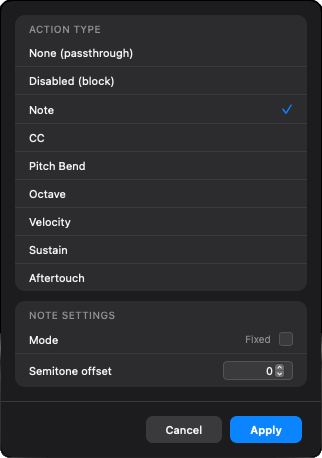
Clicking a key displays its configuration window. The default setting (None) means the key will not be used by the layout and will therefore function normally in the operating system. Setting it to Disabled means the key will be blocked and cannot be used by either the layout or the operating system. This can be useful, for example, for keys between black notes, to avoid accidentally pressing keys and sending unwanted keystrokes to the DAW.

The remaining options determine the type of MIDI data sent by the key. Their function is fairly self-explanatory. Just to clarify, there are two options for sending notes: Relative and Fixed.

  • By default it works in relative mode. In that case, set an offset value for the note. This is the note value relative to the one set in the Base Note control (main editor window).
  • The Fixed option sets a fixed value that does not change with octave transposition. When this option is selected, set the absolute note value (0-127).

For the Pitch Bend, Octave, and Velocity options, set their use to increase or decrease the control value when the key is used.

Predefined Layouts

Here is a description of all the predefined layouts and their keys.

Ableton Extended

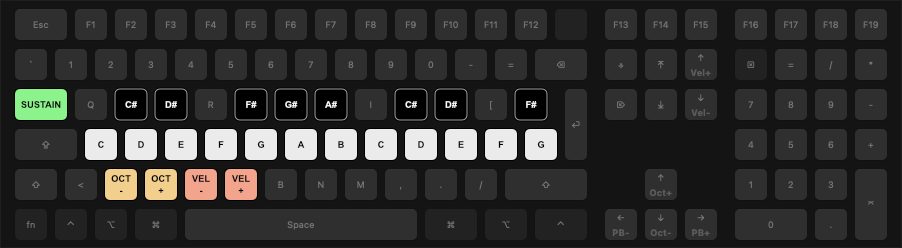
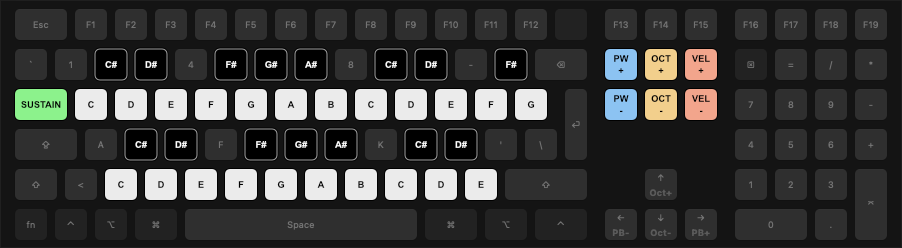
Layout similar to Live’s Computer Keyboard, expanding the keys available for MIDI sending and keeping the keys used for keyboard shortcuts accessible.

Drum Pads

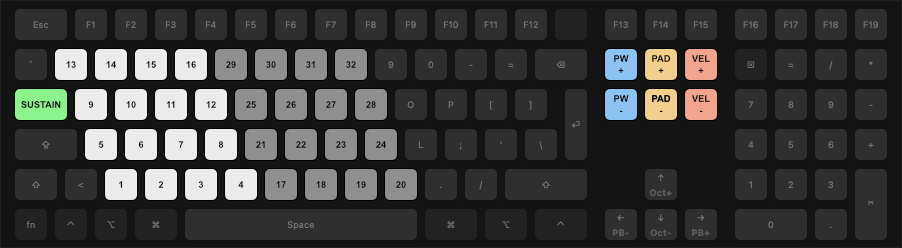
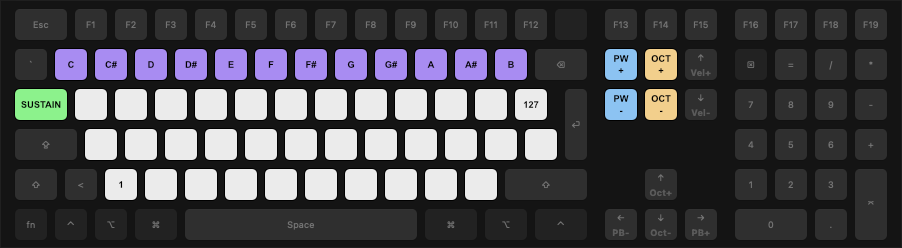
Layout designed for use with Live’s DrumRack. 32 pads available. Transpose keys shift in 16 positions to fit the DrumRack pad grouping scheme.

Drum Pads + CC

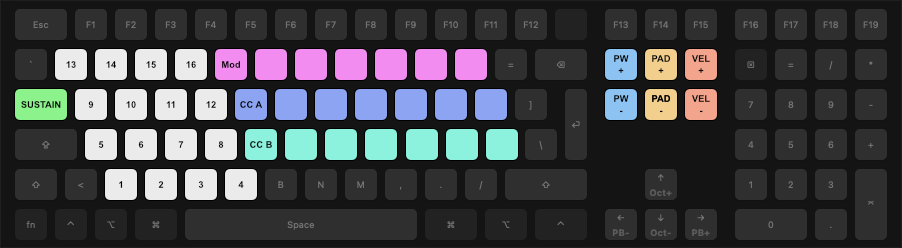
Layout for controlling 16 pads on a Live Drum Rack. It also features 3 MIDI CC send faders. The CC number sent can be configured in the app settings.

Dual Keyboard

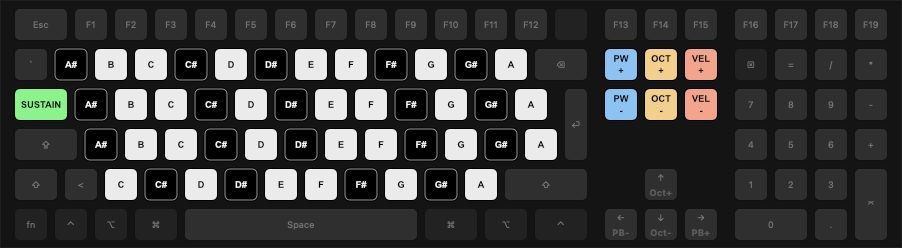
Typical layout offering a two and a half octave keyboard. Like the others, it offers keys for sustain, pitch bend, octave shift, and velocity adjustment.

inScale

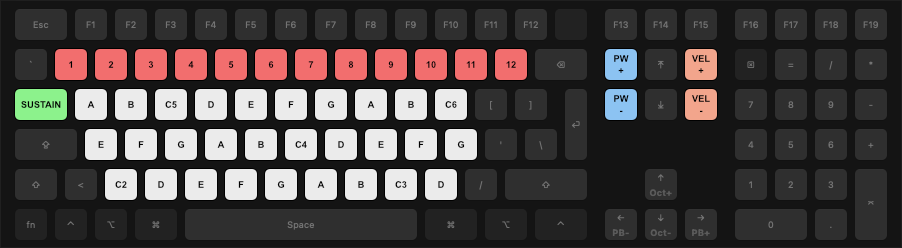
Layout designed for use with the inScale device. Allows switching between the device’s first 12 presets. The white keys correspond to the device’s note inputs, with C4 being the center note.

Logic Plus

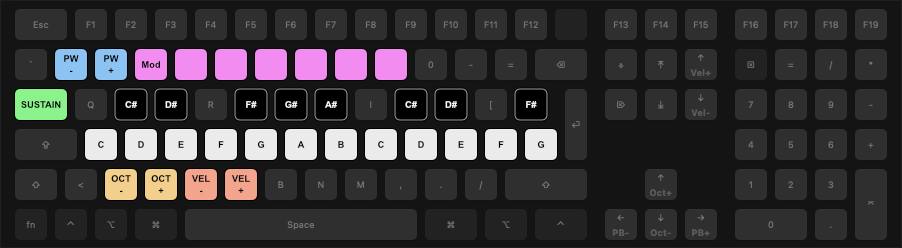
A layout that replicates Logic’s virtual keyboard, offering a sustain key, pitch bend and modulation wheel. It also expands the number of available keys compared to Logic.

MIDI Faders

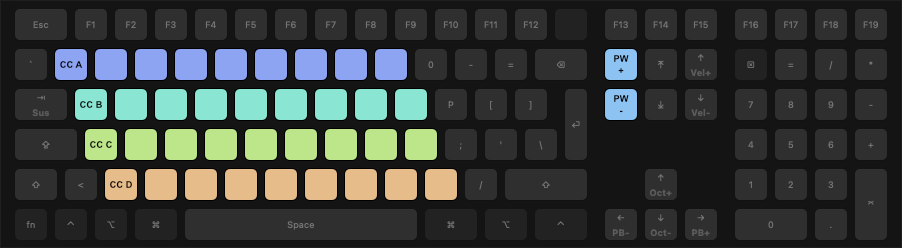
Layout that offers four faders for sending MIDI CC, plus a pitchbend wheel. The CC number sent can be configured in the app settings.

Multi Velocity

Layout designed with percussion triggering in mind. All the white keys send the same note but with different velocity. The upper keys set the sent note.

Sequential

Layout where all notes are distributed sequentially from bottom left to top right.

About killihu

I am an audio developer focused primarily on developing resources for Ableton Live. I work in collaboration with various producers to get ideas and create new tools related to music production. Feel free to contact me if you have any questions or suggestions.

Newsletter

The newsletter is only used to communicate about new releases and updates.