Ableton Live 10 / 11 / 12 with Max for Live
v1.2 New features and improvements:
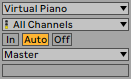
- Modified GUI to adapt to the new rack design in Live version 12.2, does not change the operation of the device.
v1.1 New features and improvements:
- Added “Virtual Piano – MPE” plugin for compatibility with MPE instruments in Live 11.
v1.0 – Initial release.
Free license (you can modify and share)